Animated images are used on many websites to present the content easily. Web designers depend on this Animated image designs mainly for Software demos and small video clips.

Here QGifer is the best tool to create animated GIFs. In this tutorial, I am explaining what the tool to create animated images is and how to use it.
This tutorial explains how to create animated GIFs by using YouTube videos. Animated GIFs have become necessary for web developers. Most of the websites are using this. But how do you create an animated GIF from YouTube videos? There are so many sites that provide this conversion process.
Here, I tested a few services for this purpose. Finally, I found that Gifs.com is one of the best gif sites, and it is so simple and easy to use. Use YouTube and make it available for you to create an animated GIF. This is a free animated gif maker.
Sooner or later, we will all encounter messages in news sites or forums containing animated GIFs that their authors have included along with the text you have written to emphasize the idea they want to convey.
The question that many people asked is: “How are these animated.gif images created?” There have long been programs (free and paid) that allow sharing GIFs from static images or videos, but they usually, require a certain degree of knowledge to take advantage of them.
You can share your animated images in social media and in blogs like small expressions, flower blooming, water drops, and rain clips.
We will see why an Animated GIF is a good alternative compared with screen-cast video
- The social networking sites like Facebook, Tumblr have loved sharing animated gifs and it needs to get popularity in this. Now Facebook does not support this animated GIF
- The browser renders this without any animated gifs plugins and scripts
- You can use these in email newsletters.
- Google images also support these animated GIFs. You need to use the “alt tag” compulsorily for these images.
This makes them not suitable for someone who is interested in creating a GIF in seconds without having to follow any manual.
Advantages of Animated Gifs
- The gif images are so simple and small in size. It loads very fast without any additional server load.
- These Animated Gif images give the professional look to company websites. not only for this, but you can also use these in your blog.
- It gives a lot of information within one image by moving the object as a movie.
- This is very helpful to make tutorials.
- You can create Funny Animated Gifs for social sites
How to make an animated GIF using videos on YouTube?
Method 1
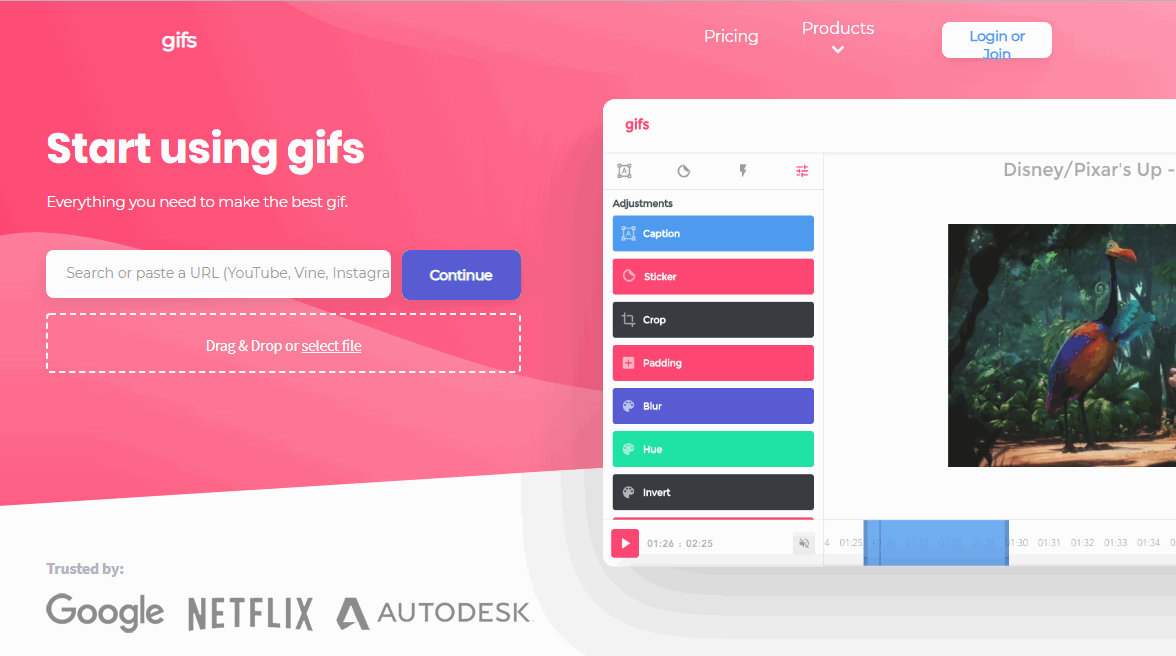
Fortunately, there are other possibilities that are much more suitable for the general public. This applies, for example, GIFs.com, a tool that, as its name suggests, allows you to create animated GIFs taking as a starting point extremely YouTube videos easily.
Step 1: Open official page
Click the official link to create animated Gifs
Step 2: Paste the Video link
Copy the YouTube video URL (To convert into Gif image) and paste the link in the Box specified on the official site. then click on Create button.

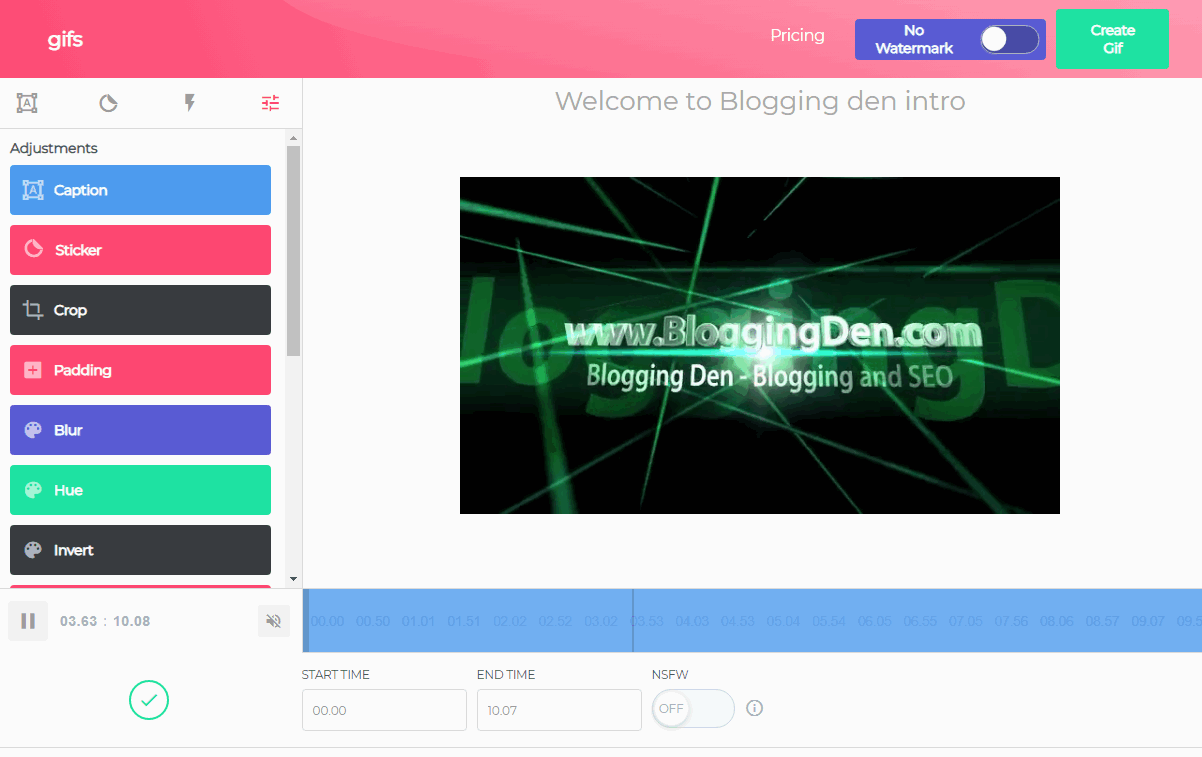
Step 3: Edit the Clip
- Now the screen will be going to the next step that is the Editing board of the Animated Gif creator.
- Make the changes as per your requirements by using Add caption, Add a sticker, Crop, and other option.
- Now adjust the length of the video to convert.
- Remember, an animated GIF should not be too long to not end up being a very large file. Finally, click on Create Gif button.

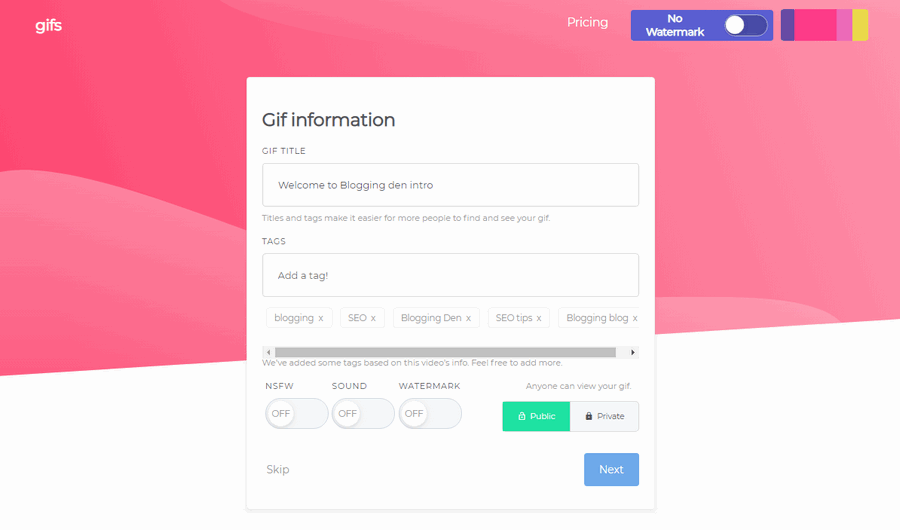
Step 4: Add GIfs information
Just add gifs information like Title and Tags. Then you will get the sharing screen to share the animated Gif on various social media like Custom site, Twitter, Reddit, Instagram, Dribble, Vine and others. Then click on the Next button.
In the free version, they will add their URL as a watermark. If you want to remove that, you have to pay a few dollars.

Step 5: Download the Final GIF
- In the next screen, the animated Gif image is ready with sharing links like Optimized link, Direct link, and Embedded Code.
- Copy the code as per your requirement then paste into your site or social site.
- If you want to download the Gif image into your system use the Download button to download the image.

This is the demo Animated GIF created here.

Ok, that’s it, if you agree with the results AWESOME press the button and then you can share this on Facebook, Twitter, Tumblr, Reddit or right click on the image to save it to your computer.
Method 2
Create Animated GIF with QGifer
- Search in Google with “QGifer” then download the software and install into your system.
- Open the software, and press “Ctrl+Alt+V” to open a Video clip.
- Adjust the Frame rate, Zoom at the left side Preview Properties. Must check the Loop option to repeat the animation in the image.
- Now Select the clip with Start and End buttons.
- After selecting the clip press “Ctrl+G” or Click on the “Extract GIF” option.
- Rendering will be started.
- Later check the preview before saving the converted clip. Then SAVE the clip. That’s it.
- Check the image in Browsers like Firefox, Chrome, Opera and Internet Explorer by drag and drop the clip into any browser.
Final Words
You can express your feelings through these animated GIFs. The blog visitor can attain more information in less time through these animated GIFs.
- 15 Top World News websites with unbiased organizations
- 8 Best Writing Apps for Serious Content Creators
- Best Royalty Free Image Websites To Make Your Blog Colourful
One doesn’t need to depend on video hosting services for this animated image for the concept.


