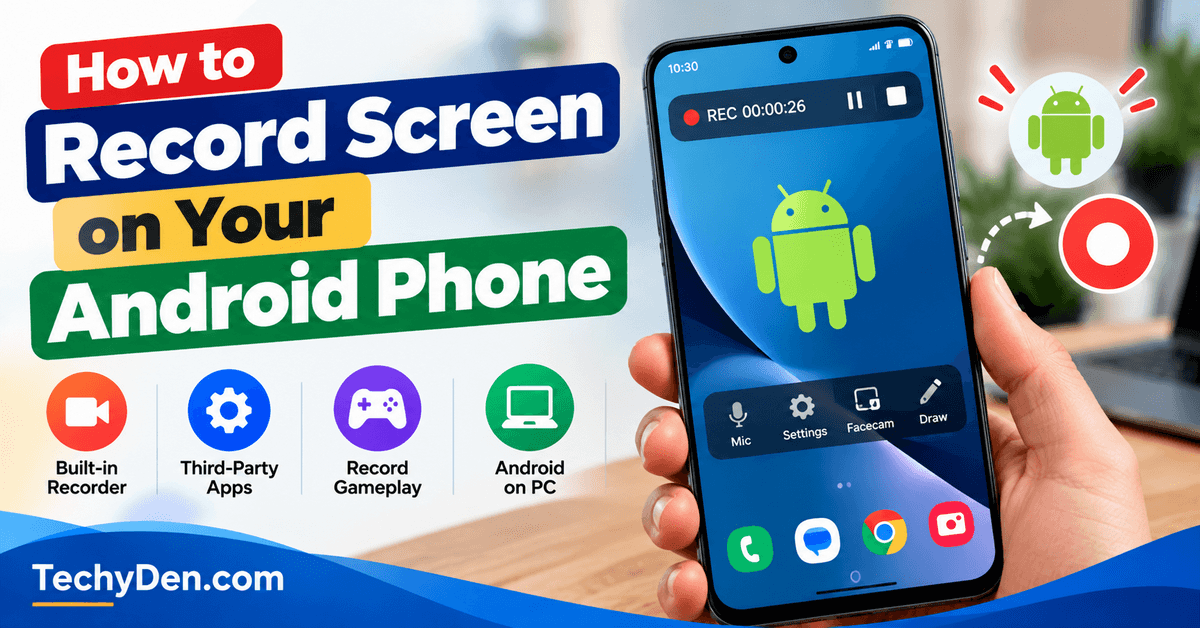
Screen recording has become a useful built-in feature on modern Android smartphones. Whether you want to create a tutorial, record gameplay, demonstrate an app problem, save an important video, or share something happening on your phone, knowing how to record screen on your Android phone can save you time and eliminate the need for additional software.
For related smartphone recording needs, you can also explore our guide to the best call recording apps for Android and iPhone to learn about available recording features and options.
Google introduced the standard Android screen recording feature with Android 11, making it easier for users to record their phone screens without installing a third-party app.
On supported devices, you can usually access the Screen Recorder option from the Quick Settings panel.
However, the screen recording experience can vary depending on your smartphone manufacturer, Android version, and software interface.
For example, Samsung Galaxy phones provide a built-in screen recorder with options for recording device audio, microphone audio, showing screen touches, adjusting video quality, and, on supported models, using the front camera while recording.
If your Android phone does not have a built-in screen recorder, you can use a trusted third-party screen recording app from the Google Play Store. Older Android devices may particularly benefit from this option, although app compatibility, recording quality, permissions, and available features can vary.
In this guide, you will learn how to record screen on your Android phone using built-in Android tools, manufacturer-specific features, and third-party screen recording apps.
We will also cover how to record audio, capture gameplay and tutorials, troubleshoot common screen recording problems, and run Android on a PC when you need a larger-screen recording setup.
Before recording, remember that some apps, videos, streaming services, calls, and other protected content may restrict screen recording because of privacy or copyright protections.
Screen recording availability and menu options can also differ between Android phones and software versions.
After recording meetings or presentations, audio transcription software can help convert spoken content into text.
If you regularly use your smartphone for productivity and everyday tasks, you can also explore our collection of useful Android apps for additional tools and recommendations.
How to Record Screen on Your Android Phone
Capture Video With Android’s Built-In Screen Recorder
Most modern Android smartphones include a built-in screen recorder, so you can capture your phone’s display without installing a third-party screen recording app. The exact steps and available features depend on your phone manufacturer, Android version, and software interface.
1. Samsung Galaxy Devices
Samsung Galaxy phones and tablets with supported One UI versions include a built-in Screen Recorder that you can access from the Quick Settings panel. Depending on the device and software version, you can record system audio, microphone audio, show screen touches, change video quality, and use the front camera while recording.
Here’s how to screen record on a Samsung Galaxy phone:
- Open Quick Settings: Swipe down from the top of the screen to open the Quick Panel. Swipe down again if necessary to see more Quick Settings options.
- Find Screen Recorder: Tap Screen recorder. If you cannot find it, tap the Edit button and add Screen recorder to your Quick Settings panel.
- Choose Sound Settings: Select whether you want to record No sound, Media sounds, or Media sounds and mic. The available options may vary by model.
- Start Recording: Tap Start recording. A short countdown will appear before the screen recording begins.
- Use the Recording Controls: While recording, Samsung provides on-screen controls that may allow you to pause or stop the recording, draw or write on the screen, and show your front-camera video.
- Add a Selfie Video: On supported Galaxy devices, tap the Front camera icon to display a small camera window over the screen recording. You can move the selfie window to another position on the screen.
- Show Screen Touches: If available, enable the option to show taps and touches. This is particularly useful when creating Android tutorials or app demonstrations.
- Stop the Recording: Tap the Stop button when you finish. The recorded video is normally saved in the Gallery app, usually under the Screen recordings album.
You can also customize screen recording options by going to Settings > Advanced features > Screenshots and screen recordings. Depending on your Galaxy model and One UI version, available settings can include sound, video quality, video size, selfie video size, touch indicators, and the storage location.
Samsung notes that some apps, videos, websites, and other protected content may prevent screen recording because of copyright or other restrictions. Screen recording support and available features can also vary by Galaxy model and software version.
2. Google Pixel Devices
Google Pixel phones provide a built-in Screen record option through Quick Settings. Current Pixel software gives you more recording choices than older versions, including the ability to record a single app or the entire screen, capture audio, and use the front camera while recording.
Here’s how to record your screen on a Google Pixel phone:
- Open Quick Settings: Swipe down twice from the top of the screen to open the full Quick Settings panel.
- Select Screen Record: Tap Screen record. If you don’t see it, swipe through the Quick Settings pages or tap Edit and add Screen record to the panel.
- Choose What to Record: Before starting, select whether you want to record a single app or your entire screen.
- Choose Audio Options: You can choose whether to record device audio, microphone audio, or the available audio options shown on your Pixel device.
- Enable Selfie Camera: On supported Pixel devices, you can turn on Show selfie camera to display your front-camera video while recording the screen. This is useful for tutorials, demonstrations, reaction videos, and gameplay commentary.
- Start Recording: Tap Start. A countdown will appear, and the screen recording will begin.
- Stop Screen Recording: Swipe down from the top of the screen and tap the Screen recorder notification to stop recording.
- Find the Recording: Screen recordings can be accessed through the Google Photos app. On supported devices, you can also edit, trim, or share the recording directly after stopping it.
The Pixel screen recorder is useful for recording app demonstrations, troubleshooting steps, gameplay, tutorials, and other on-screen activity. However, some apps or protected content may restrict recording or prevent certain content from being captured.
Samsung vs. Google Pixel Screen Recording
Both Samsung Galaxy and Google Pixel phones provide built-in screen recording, but the interface and available controls can differ.
| Feature | Samsung Galaxy | Google Pixel |
|---|---|---|
| Built-in screen recorder | Yes, on supported models | Yes |
| Quick Settings access | Yes | Yes |
| Full-screen recording | Yes | Yes |
| Single-app recording | Model/software dependent | Yes |
| Device audio | Supported | Supported |
| Microphone audio | Supported | Supported |
| Show screen touches | Supported on compatible models | Available options vary |
| Front/selfie camera | Supported on compatible models | Supported on current supported Pixel devices |
| Draw on screen | Supported | Not the same as Samsung’s recording toolbar |
| Pause recording | Supported on compatible devices | Recording controls depend on device/software |
| Save location | Gallery / Screen recordings | Google Photos / device storage |
If your phone does not show a Screen Recorder option, check your Quick Settings customization first. If the feature is not supported by your device, you can consider a reputable third-party screen recording app for Android.
Screen Recording with Third-Party Apps
Most modern Android phones include a built-in screen recorder, so you may not need to install another app. However, third-party screen recording apps for Android can be useful when your phone does not provide screen recording or when you need additional features such as advanced video controls, facecam recording, drawing tools, video editing, livestreaming, or more control over resolution and frame rate.
Third-party screen recorders are particularly useful for Android screen recording, gameplay videos, tutorials, app demonstrations, troubleshooting videos, and content creation. Many current apps also support internal audio recording on compatible devices running Android 10 or later.
Before installing a screen recorder, check its Google Play listing, permissions, data-safety information, supported Android versions, and whether the features you need are available in the free version.
Here are three popular screen recorder apps for Android:
1. ADV Screen Recorder
ADV Screen Recorder is a lightweight Android screen recorder designed for users who want more control over their recordings without requiring root access.
Key features include:
- No Root Required: Record your Android screen without rooting the device.
- Multiple Recording Engines: The app provides different recording-engine options to improve compatibility across Android devices.
- Custom Recording Controls: Adjust recording settings according to your device and recording requirements.
- On-Screen Drawing: Draw or annotate directly on the screen while recording, which is useful for tutorials and demonstrations.
- Text and Visual Annotations: Add text or other on-screen information while explaining something during a recording.
- Front Camera Support: Use the front camera for supported recording setups when you want to include a facecam.
- Audio Recording: Capture microphone audio and supported audio sources depending on your Android version and device.
- Screen Touch Indicators: Show touch interactions to make tutorials and app demonstrations easier to follow.
- Recording Orientation: Control the orientation of your screen recording where supported.
- Power-User Controls: ADV is a good choice when you want more direct recording controls rather than a simple one-tap recorder.
ADV Screen Recorder remains available on Google Play and was updated in September 2026, making it a current option rather than a legacy screen-recording app.
2. AZ Screen Recorder
AZ Screen Recorder is one of the most established screen recording apps for Android and is designed for everyday screen capture as well as gameplay and content creation.
The current app provides a broad set of recording, editing, and sharing features:
- No Root Required: Record your screen without rooting your Android phone.
- High-Quality Screen Recording: Choose supported resolution, frame rate, and other video settings according to your device.
- Internal Audio Recording: Record device audio on supported Android versions, including internal audio support on Android 10 and later.
- Microphone Recording: Record your voice through the microphone for tutorials, demonstrations, and commentary.
- Pause and Resume: Pause the recording and continue later without creating separate video clips.
- Facecam Recording: Use the front camera while recording your screen on supported devices.
- Screen Drawing: Draw or highlight areas of the screen while recording.
- Video Editing: Trim, cut, merge, crop, rotate, and make other supported edits to your recordings.
- GIF Creation: Convert suitable screen recordings into GIF files.
- Live Streaming: Stream supported screen content to platforms such as YouTube and other supported services.
- Screenshot Capture: Capture still images of your Android screen in addition to recording video.
- No Watermark: The current Google Play listing advertises recording without a watermark and without a recording time limit.
AZ Screen Recorder is a strong choice for users who want an all-in-one Android screen recorder and video editor rather than a basic recording tool. The app contains advertisements and offers in-app purchases.
3. XRecorder
XRecorder is another popular Android screen recorder from InShot. It focuses on simple screen capture while also providing features for gameplay, tutorials, audio recording, screenshots, editing, and livestreaming.
Key features include:
- Easy Screen Recording: Start recording quickly using the floating recording controls.
- No Root Required: Record your Android screen without root access.
- HD Screen Recording: Capture clear screen videos using supported resolution and frame-rate settings.
- Internal Audio: Record internal device audio on supported Android 10 and later devices.
- Microphone Audio: Record your voice while capturing the screen.
- Gameplay Recording: Capture Android gameplay with supported audio and video settings.
- No Recording Time Limit: The current Google Play listing advertises screen recording without a recording time limit.
- No Watermark: XRecorder advertises watermark-free screen recordings.
- Floating Controls: Start, stop, and manage recordings without repeatedly returning to the main app.
- Screenshot Tool: Capture screenshots while using the app.
- Video Editing: Edit and prepare screen recordings before sharing them.
- Livestreaming: Supports livestreaming through supported platforms and RTMP configurations.
- Simple Sharing: Share recorded videos directly through supported Android apps and services.
XRecorder is particularly useful for users who want a simple screen recorder for Android that can handle tutorials, gameplay, video demonstrations, and everyday screen captures without a complicated setup.
Which Third-Party Android Screen Recorder Should You Choose?
The best screen recorder depends on what you want to do.
| Screen Recorder | Best For | Key Strength |
|---|---|---|
| ADV Screen Recorder | Tutorials and advanced controls | Drawing and customizable recording controls |
| AZ Screen Recorder | All-around screen recording | Recording, editing, facecam, and livestreaming |
| XRecorder | Easy recording and gameplay | Simple interface, audio recording, editing, and sharing |
If your Android phone already includes a built-in screen recorder, try that first. It usually provides the simplest experience with fewer additional permissions and no need to install another app. Choose a third-party screen recorder app for Android when you need features that your phone’s built-in recorder does not provide.
Keep in mind that screen-recording capabilities can vary by Android version, smartphone manufacturer, and the app being recorded. Some apps and streaming services may restrict screen capture or audio recording because of privacy, security, copyright, or content-protection policies.
Advanced Features of Third-Party Screen Recording Apps
Third-party screen recording apps for Android can provide additional controls that may not be available in your phone’s built-in recorder. These features are especially useful when you create tutorials, record gameplay, demonstrate apps, make educational videos, or produce content for YouTube and social media.
The exact features depend on the app, Android version, smartphone manufacturer, and permissions available to the recorder.
1. Pause and Resume Recording
Many third-party screen recorders allow you to pause and resume a recording without creating multiple video files. This is useful when making long tutorials or demonstrations because you can remove unnecessary sections without starting a completely new recording.
2. Front Camera or Facecam Overlay
A front-camera overlay lets you show your face while recording the Android screen. This is useful for tutorials, gameplay commentary, reaction videos, online courses, and product demonstrations.
Apps such as AZ Screen Recorder and XRecorder provide facecam options on supported devices. The size and position of the camera window may be adjustable.
3. Screen Touch Indicators
Screen touch indicators show viewers where you tap or interact with the display. This feature is particularly useful when explaining Android settings, demonstrating an app, or creating step-by-step tutorials.
If you regularly create instructional videos, enabling touch indicators can make your recordings much easier to follow.
4. Drawing and Annotations
Some Android screen recording apps allow you to draw, highlight, or add annotations while recording. You can use these tools to point out buttons, settings, menus, or other important areas of the screen.
This feature is especially helpful for educational videos and technical tutorials.
5. Custom Video Settings
Advanced screen recorders can provide more control over the recording output. Depending on the app and device, you may be able to change:
- Resolution
- Frame rate
- Bit rate
- Video orientation
- Audio source
- Recording quality
- Front-camera settings
- Storage location
Higher resolution and frame rates can produce better-looking videos, but they can also increase file size and battery usage.
6. Internal Audio and Microphone Recording
Modern Android screen recorders can support internal audio recording on compatible devices. Some apps also allow you to record microphone audio at the same time, making it possible to capture both device sounds and your voice.
Internal audio support depends on Android version, device manufacturer, and the app being recorded. Some apps may restrict audio capture.
7. Video Editing
Some screen recording apps now include basic video editing tools, allowing you to trim, cut, crop, merge, rotate, or otherwise prepare a recording before sharing it.
Using an integrated editor can be convenient when you only need to make quick changes rather than opening a separate video editing application.
8. Livestreaming
Some advanced screen recorders support live streaming to supported platforms or RTMP destinations. This can be useful for mobile gaming, demonstrations, presentations, and live tutorials.
However, streaming availability and supported platforms can change, so check the app’s current features before choosing it specifically for livestreaming.
9. Screenshots During Recording
Certain screen recording apps allow you to capture screenshots while recording. This is useful when you need both a video demonstration and individual images for documentation, tutorials, or blog posts.
10. Watermark and Recording-Length Controls
Some third-party recorders offer watermark-free recording or longer recording sessions, although these features may vary between free and premium versions.
Always check the current pricing and feature restrictions before choosing an app if watermark-free or unlimited recording is important to you.
Run Android on Your PC for Screen Recording
If you want to record Android apps on a larger display, there are now two main approaches: mirror a real Android phone to Windows or run Android apps through an Android emulator.
If you want to learn more about running mobile applications on a Windows computer, see our detailed guide on how to run Android apps on Windows 11.
The best method depends on whether you want to record activity from your actual smartphone or an Android environment running directly on your computer.
Using Samsung Galaxy Devices with Windows
For supported Samsung Galaxy devices, Link to Windows and Microsoft’s Phone Link provide a modern way to view and interact with your phone from a Windows 10 or Windows 11 PC.
Samsung’s current instructions use Phone Link rather than Samsung Flow for phone-screen mirroring. Availability and features vary according to the Galaxy model, Windows version, software version, and region.
Here’s how to mirror a supported Galaxy phone to Windows:
- Connect Your Galaxy Phone to Windows: Set up Link to Windows on your Galaxy phone and connect it to the Phone Link app on your Windows PC.
- Open Phone Link: Launch the Phone Link app on your Windows computer after completing the pairing process.
- Select Apps or Phone Screen: Depending on your device and software version, select Apps or Phone Screen.
- Start Phone Screen: Select Open phone screen and approve the required permission on your Galaxy phone.
- Control Your Phone: Once connected, you can view and interact with supported phone content from the Windows PC.
- Start Windows Screen Recording: Use a Windows screen-capture tool such as Snipping Tool, Xbox Game Bar, or another recording application to capture the mirrored phone screen.
Samsung notes that available features can vary by device and software version. Some apps may also restrict content from being displayed or shared on another screen.
Important: Samsung’s older DeX for PC workflow should not be presented as the current universal solution. Samsung states that DeX for PC is no longer supported on Galaxy devices running One UI 7 or later, with Link to Windows serving as the alternative for supported connected-device functions.
Using Android Emulators on Windows
Another option is to run Android applications directly on your Windows PC using an Android emulator. This is useful when you want to record an Android app or game without using your physical smartphone.
Before setting up an emulator, you can learn more about running Android apps on Windows 11 and the different ways to use Android applications on a PC.
Popular Android emulator options include:
- BlueStacks: A widely used Android emulator for running Android apps and games on Windows and macOS. It can also be used with screen-recording workflows and OBS-based setups.
- NoxPlayer: An Android emulator focused heavily on running Android games and applications on a computer.
- MEmu Play: Another Android emulator designed primarily for Android gaming and application compatibility on PCs.
The exact Android version, performance, graphics options, and app compatibility can differ between emulators, so choose one based on the Android application you need to run.
How to Record Android Apps Running on a PC
Once you have installed and configured an Android emulator:
- Install the Emulator: Download and install a reputable Android emulator on your Windows PC.
- Sign In to Google Play: Complete the Google Play setup if the emulator requires it.
- Install the Android App: Search for and install the application or game you want to record.
- Configure the Emulator: Adjust the display resolution, graphics settings, and other options according to your recording requirements.
- Open the Android App: Launch the application or game inside the emulator.
- Start Screen Recording: Use Windows Snipping Tool, Xbox Game Bar, OBS Studio, or another compatible screen recorder.
- Record Your Content: Capture the Android application at the desired resolution and frame rate.
- Edit and Export: Trim or edit the resulting video before publishing or sharing it.
BlueStacks also supports workflows involving OBS for recording and streaming Android applications running in the emulator.
Which Method Should You Use?
Choose the method based on what you want to record:
| Method | Best For | Main Advantage |
|---|---|---|
| Built-in Android Screen Recorder | Everyday phone recording | Simple and requires no additional app |
| Third-Party Screen Recorder | Advanced mobile recording | More recording and editing controls |
| Samsung Link to Windows + Phone Link | Recording a real Galaxy phone on Windows | View and interact with supported phone content from a PC |
| Android Emulator | Recording Android apps on a PC | Runs Android apps directly on the computer |
| OBS Studio | Professional recording and streaming | Advanced scenes, sources, audio, and recording controls |
For most users, the built-in Android screen recorder remains the easiest option. If you need advanced mobile recording features, use a reputable third-party app. If your goal is to create higher-quality tutorials or record Android applications on a large display, mirroring a supported phone to Windows or using an Android emulator with a desktop screen recorder can provide a more flexible workflow.
Conclusion
Learning how to record screen on your Android phone is easier than ever because most modern Android devices now include a built-in screen recorder. Whether you use a Samsung Galaxy, Google Pixel, or another supported Android smartphone, you can usually capture your screen without installing an additional app.
For everyday screen recording, the built-in recorder is often the best option because it is simple, convenient, and integrated directly into the phone’s software. Depending on your device, you may also be able to record internal audio, microphone audio, screen touches, a single app, the entire screen, or your front-camera video.
If your phone does not include the features you need, a reputable third-party screen recording app for Android can provide additional options such as facecam overlays, drawing tools, advanced video settings, editing, screenshots, and livestreaming.
You can also record Android content on a Windows PC by mirroring a supported smartphone or running Android apps through an emulator. Desktop tools such as Snipping Tool, Xbox Game Bar, and OBS Studio can then be used to capture the larger display.
Before recording, check your Android version, device-specific features, available storage, audio settings, and any privacy or content restrictions. Some apps and protected content may prevent screen or audio recording.
Overall, the best method depends on what you want to record. Start with your phone’s built-in Android screen recorder, use a trusted third-party app when you need advanced features, and choose a PC-based solution when you need a larger display or more professional recording controls. With the right method and settings, you can create clear, useful screen recordings for tutorials, gameplay, troubleshooting, education, and content creation.